What is Apache CloudStack?
Apache CloudStack is an open-source cloud computing platform for building, managing, and deploying infrastructure cloud services. Consider it an option to transform your physical servers into a flexible, scalable cloud where you can efficiently create, manage and deploy virtual machines and applications.
CloudStack is especially used by corporate entities and firms who wish to gain control over their cloud data center, and at the same time realise various advantages – scale, resources etc., associated with cloud computing. While similar cloud services would be AWS or Google Cloud, which are public, clouStack allows you to have complete control over your data or infrastructure.
It is hypervisor agnostic, working across KVM, VMware vSphere and XenServer. It also offers a user-friendly web-based interface to manage your cloud resources so it is easy to use, even for non-technical users.
In this tutorial, we will present the installation flows of CloudStack on top of a single server so that beginners can play around with it for testing or learning how CloudStack works. It’s great for testing and playing with CloudStack before you move to a “real life” CloudStack environment with several servers.
CloudStack installationSystem Requirements
Before we proceed with the installation of CloudStack, let’s cover the prerequisites. CloudStack is a heavy platform, the more hardware is available the easier it will run and the faster it will be.
Minimum Hardware Requirements
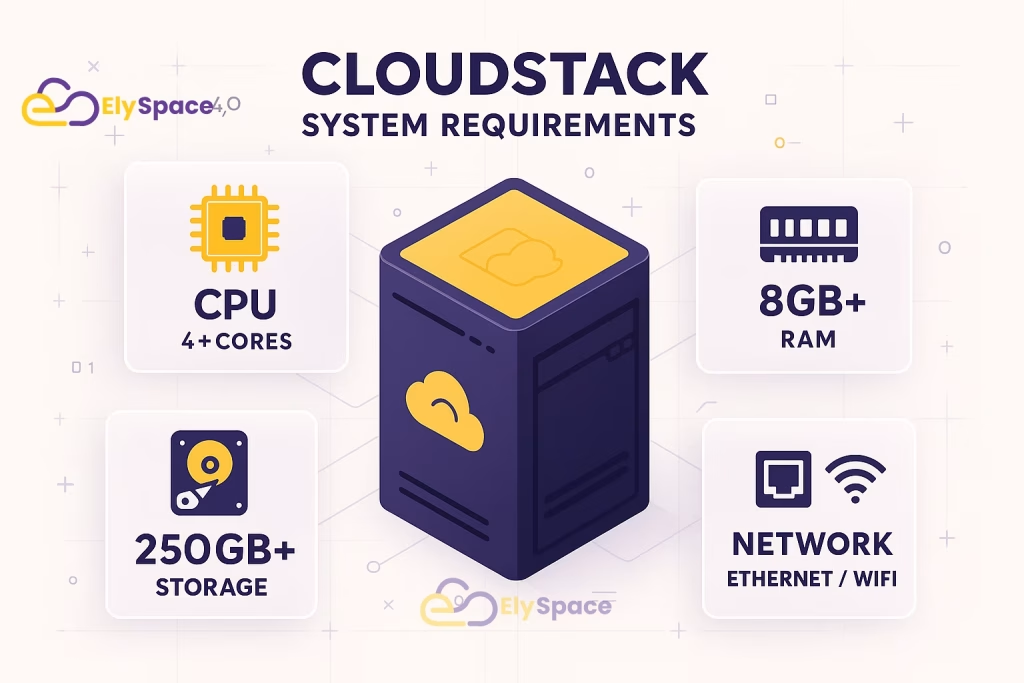
For a basic test lab setup, your server should have the following specifications:
CPU Requirements:
- At least 4 CPU cores (8 cores recommended for better performance)
- 64-bit processor with virtualization support (Intel VT-x or AMD-V)
- Virtualization must be enabled in BIOS/UEFI settings
Memory Requirements:
- Minimum 8 GB RAM (16 GB or more recommended)
- Additional RAM will be needed for virtual machines you plan to run
Storage Requirements:
- At least 250 GB of available disk space
- SSD storage is highly recommended for better performance
- Separate storage for virtual machine data is preferred
Network Requirements:
- At least one network interface card (NIC)
- Stable internet connection for downloading packages and updates
- Static IP address is recommended for production environments
Supported Operating Systems
CloudStack works best on Red Hat Enterprise Linux (RHEL) based distributions. The most stable and recommended options are:
- CentOS 7 or 8 (most commonly used and well-tested)
- Rocky Linux 8 (excellent alternative to CentOS)
- Red Hat Enterprise Linux 7 or 8
- AlmaLinux 8 (another CentOS alternative)
While CloudStack can run on other Linux distributions, the installation process and package availability are optimized for RHEL-based systems. For this tutorial, we’ll use CentOS 7 as our base operating system.
Network Configuration Requirements
Proper network configuration is crucial for CloudStack to function correctly. Your server should have:
- A properly configured hostname that resolves correctly
- DNS resolution working properly
- NTP (Network Time Protocol) configured for time synchronization
- Firewall rules configured appropriately (we’ll disable it for lab setup)
Pre-Installation Setup
The pre-installation setup is one of the most critical phases of CloudStack deployment. Many installation failures can be traced back to improper system preparation. In this section, we’ll prepare your system step by step, explaining why each step is necessary and what could go wrong if skipped.
Step 1: System Update and Package Management
The first step in any server setup is ensuring all system packages are up to date. This prevents compatibility issues and security vulnerabilities that could affect CloudStack’s operation.
yum update -yWhat this command does:
This command updates all installed packages on your system to their latest versions. The -y flag automatically answers “yes” to all prompts, making the process non-interactive.
Why this is important:
Outdated packages can cause compatibility issues with CloudStack components. Security vulnerabilities in old packages could also compromise your cloud infrastructure. Additionally, CloudStack installation scripts expect certain package versions to be available.
What could go wrong:
If you skip this step, you might encounter dependency conflicts during CloudStack installation. Some packages might fail to install due to version mismatches, leading to a broken installation.
Time required: 5-15 minutes depending on your internet connection and the number of packages to update.
Step 2: Hostname Configuration
Setting a proper hostname is crucial for CloudStack’s networking and database connectivity. Many CloudStack components use the hostname to identify and communicate with each other.
hostnamectl set-hostname cloudstack-mgmtWhat this command does:
This command permanently sets your server’s hostname to “cloudstack-mgmt”. The hostname will persist across reboots and be used by all system services.
Why this is important:
CloudStack uses hostnames for internal communication between components. The management server, database, and hypervisor agents all need to be able to resolve each other’s hostnames. An improperly configured hostname can cause connection failures and service startup issues.
Best practices for hostname selection:
- Use a descriptive name that indicates the server’s role
- Avoid special characters and spaces
- Keep it short but meaningful
- Ensure it follows DNS naming conventions
What could go wrong:
If the hostname is not properly set or changes after installation, CloudStack services might fail to start or communicate with each other. This is one of the most common causes of installation failures.
Step 3: SELinux Configuration
Security-Enhanced Linux (SELinux) is a security module that provides access control policies. While excellent for security, it can interfere with CloudStack’s operation during installation and testing.
setenforce 0
sed -i 's/^SELINUX=.*/SELINUX=disabled/' /etc/selinux/config
What these commands do:
The first command temporarily disables SELinux for the current session. The second command permanently disables SELinux by modifying the configuration file, so it remains disabled after reboot.
Why we disable SELinux:
SELinux policies can block CloudStack services from accessing required files, ports, and system resources. While it’s possible to configure SELinux policies for CloudStack, it’s complex and beyond the scope of a basic installation. For production environments, you should consider creating proper SELinux policies instead of disabling it entirely.
Security considerations:
Disabling SELinux reduces your system’s security posture. In production environments, you should work with security teams to create appropriate SELinux policies that allow CloudStack to function while maintaining security.
Alternative approach for production:
Instead of disabling SELinux completely, you can set it to permissive mode initially and then create custom policies based on the audit logs.
Step 4: Firewall Configuration
For a test lab environment, we’ll disable the firewall to simplify networking. In production environments, you would configure specific firewall rules instead.
systemctl stop firewalld
systemctl disable firewalld
What these commands do:
The first command immediately stops the firewall service. The second command prevents the firewall from starting automatically when the system boots.
Why we do this for lab setup:
CloudStack uses many different ports for communication between components. Configuring all the necessary firewall rules can be complex and is often a source of connectivity issues during initial setup. For learning purposes, it’s easier to disable the firewall entirely.
Production considerations:
In production environments, you should never disable the firewall completely. Instead, configure specific rules to allow only the necessary CloudStack ports. The main ports you’ll need to open include:
- Port 8080 (Management Server web interface)
- Port 8250 (Management Server API)
- Port 3306 (MySQL database)
- Various ports for hypervisor communication
Security implications:
Disabling the firewall exposes your server to potential network attacks. Only do this in isolated test environments that are not accessible from untrusted networks.
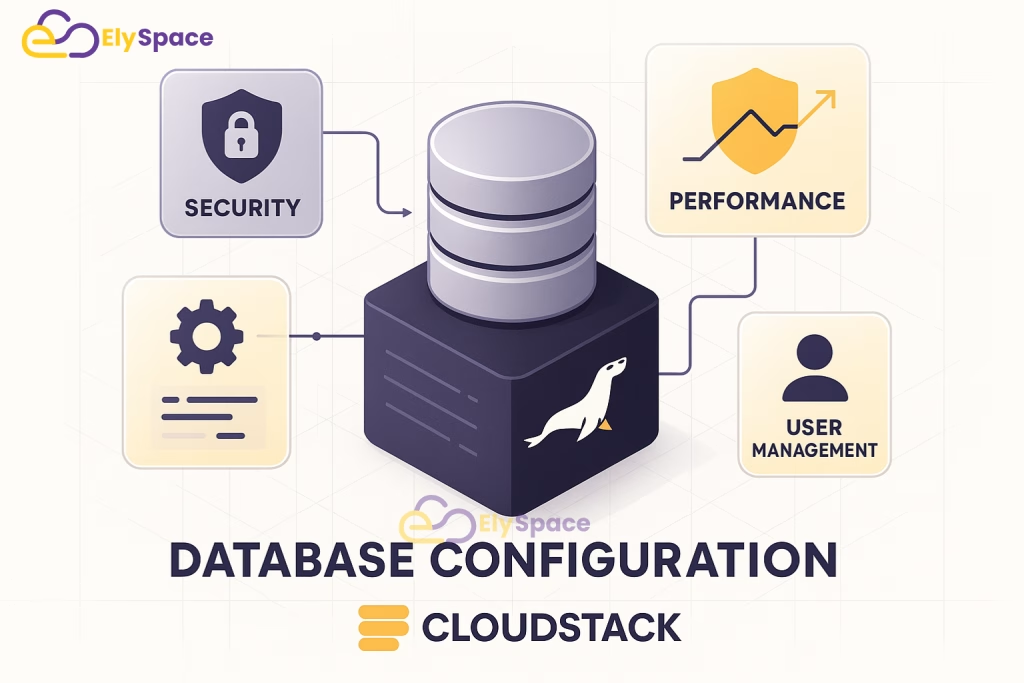
Database Configuration
The database is the heart of your CloudStack infrastructure. It stores all configuration data, user information, virtual machine metadata, and operational logs. Proper database setup is crucial for CloudStack’s stability and performance. In this section, we’ll install and configure MariaDB (a MySQL-compatible database) specifically optimized for CloudStack.
Understanding CloudStack’s Database Requirements
CloudStack requires a relational database to store its configuration and operational data. The database contains information about:
- User accounts and permissions
- Virtual machine configurations and states
- Network configurations and IP allocations
- Storage pool information and volume metadata
- Hypervisor host information and capabilities
- Templates and ISO images metadata
- Billing and usage statistics
The database must be highly available and performant, as CloudStack queries it frequently for all operations. A slow or unreliable database will directly impact your cloud’s performance and user experience.
Step 1: Installing MariaDB Database Server
MariaDB is a popular, open-source database that’s fully compatible with MySQL. It’s the recommended database for CloudStack due to its stability, performance, and active development community.
yum install -y mariadb-server
systemctl enable mariadb --now
What these commands do:
The first command installs the MariaDB server package and all its dependencies. The second command enables the MariaDB service to start automatically at boot time and immediately starts the service.
Why we use MariaDB:
MariaDB offers several advantages over other database options:
- Excellent performance with CloudStack workloads
- Strong community support and regular updates
- Full MySQL compatibility
- Better default configuration for modern workloads
- Enhanced security features
What happens during installation:
The installation process creates a new system user called ‘mysql’, sets up the database directory structure, and installs the necessary binary files. The service startup initializes the database system and creates the initial system databases.
Verification step:
You can verify that MariaDB is running correctly by checking its status:
systemctl status mariadbYou should see output indicating that the service is “active (running)”.
Step 2: Securing the Database Installation
The default MariaDB installation has several security vulnerabilities that need to be addressed before using it in production. The mysql_secure_installation script helps fix these issues.
mysql_secure_installationWhat this script does:
This interactive script guides you through several security improvements:
- Set root password: Creates a strong password for the database root user
- Remove anonymous users: Deletes default anonymous user accounts that could be exploited
- Disable remote root login: Prevents root login from remote hosts for security
- Remove test database: Deletes the default test database that’s accessible to all users
- Reload privilege tables: Applies all the security changes immediately
Interactive prompts you’ll encounter:
When you run the script, you’ll be asked several questions. Here are the recommended responses:
- Set root password? → Yes (choose a strong password and remember it)
- Remove anonymous users? → Yes
- Disallow root login remotely? → Yes
- Remove test database? → Yes
- Reload privilege tables? → Yes
Security best practices:
- Use a complex password with at least 12 characters
- Include uppercase, lowercase, numbers, and special characters
- Avoid dictionary words or personal information
- Store the password securely (consider using a password manager)
What could go wrong:
If you forget the root password, you’ll need to reset it using special procedures, which can be complex and time-consuming. Make sure to document the password securely.
Step 3: Optimizing Database Configuration for CloudStack
CloudStack has specific database requirements that differ from typical web applications. We need to modify the MariaDB configuration to handle CloudStack’s transaction patterns and connection requirements.
vi /etc/my.cnf.d/server.cnfAdd the following configuration under the [mysqld] section:
[mysqld]
innodb_rollback_on_timeout=1
innodb_lock_wait_timeout=600
max_connections=350
log-bin=mysql-bin
binlog-format = 'ROW'
default-storage-engine=innodb
innodb_file_per_table=1
innodb_buffer_pool_size=1G
Detailed explanation of each setting:
innodb_rollback_on_timeout=1:
This setting ensures that when a transaction times out, the entire transaction is rolled back rather than just the current statement. CloudStack performs complex multi-statement transactions, and partial rollbacks can lead to data inconsistency.
innodb_lock_wait_timeout=600:
Sets the timeout for InnoDB row locks to 600 seconds (10 minutes). CloudStack sometimes performs long-running operations that require extended lock times. The default timeout of 50 seconds is too short and can cause operation failures.
max_connections=350:
Increases the maximum number of simultaneous database connections. CloudStack management server and agents create multiple connections, and the default limit of 151 connections can be quickly exhausted in busy environments.
log-bin=mysql-bin:
Enables binary logging, which is required for database replication and point-in-time recovery. While not strictly necessary for single-node setups, it’s a good practice for production environments.
binlog-format = ‘ROW’:
Sets the binary log format to ROW-based replication. This format is more reliable for CloudStack’s complex transactions and is required if you plan to set up database replication later.
default-storage-engine=innodb:
Ensures that all new tables use the InnoDB storage engine by default. InnoDB provides ACID compliance, row-level locking, and crash recovery features that CloudStack requires.
innodb_file_per_table=1:
Creates a separate file for each InnoDB table instead of using a shared tablespace. This improves performance and makes database maintenance easier.
innodb_buffer_pool_size=1G:
Sets the InnoDB buffer pool size to 1 GB. This is the most important performance setting for InnoDB. The buffer pool caches table data and indexes in memory. For systems with more RAM, you can increase this value (typically 70-80% of available RAM for dedicated database servers).
Step 4: Applying Configuration Changes
After modifying the configuration file, you need to restart MariaDB to apply the changes:
systemctl restart mariadbWhat happens during restart:
The database server reads the new configuration file and applies all the settings. This process usually takes 10-30 seconds, depending on your system’s performance and the amount of data in the database.
Verification steps:
You can verify that the configuration changes were applied correctly by connecting to the database and checking the settings:
mysql -u root -p -e "SHOW VARIABLES LIKE 'max_connections';"
mysql -u root -p -e "SHOW VARIABLES LIKE 'innodb_buffer_pool_size';"
These commands should show the values you configured in the settings file.
Common configuration issues:
- Syntax errors: Make sure there are no typos in the configuration file
- Invalid values: Some settings have minimum and maximum allowed values
- Memory allocation: Don’t set innodb_buffer_pool_size larger than available RAM
- File permissions: Ensure the configuration file is readable by the mysql user
Step 5: Creating CloudStack Database and User
Now we’ll create the specific database and user account that CloudStack will use. This step is crucial because CloudStack needs its own dedicated database space and user with appropriate permissions.
mysql -u root -pOnce connected to the MySQL prompt, execute these SQL commands:
CREATE DATABASE cloud;
CREATE USER 'cloud'@'localhost' IDENTIFIED BY 'your_strong_password';
GRANT ALL PRIVILEGES ON cloud.* TO 'cloud'@'localhost';
FLUSH PRIVILEGES;
EXIT;
What these SQL commands do:
CREATE DATABASE cloud:
Creates a new database named ‘cloud’ where CloudStack will store all its data. This database will contain dozens of tables with information about users, virtual machines, networks, storage, and more.
CREATE USER ‘cloud’@’localhost’:
Creates a new database user named ‘cloud’ that can only connect from the local machine (localhost). This user will be used by CloudStack services to access the database.
GRANT ALL PRIVILEGES:
Gives the ‘cloud’ user complete access to the ‘cloud’ database. This includes permissions to create, modify, and delete tables and data. CloudStack needs these extensive permissions to manage its schema and data.
FLUSH PRIVILEGES:
Reloads the privilege tables to ensure the new user and permissions are immediately available.
Security considerations:
- Replace ‘your_strong_password’ with a complex, unique password
- The ‘cloud’ user is restricted to localhost connections only
- Never use the root database user for CloudStack operations
- Consider using different passwords for different environments
Password requirements:
Your CloudStack database password should:
- Be at least 12 characters long
- Include uppercase and lowercase letters
- Include numbers and special characters
- Not contain dictionary words or personal information
- Be unique and not used for other systems
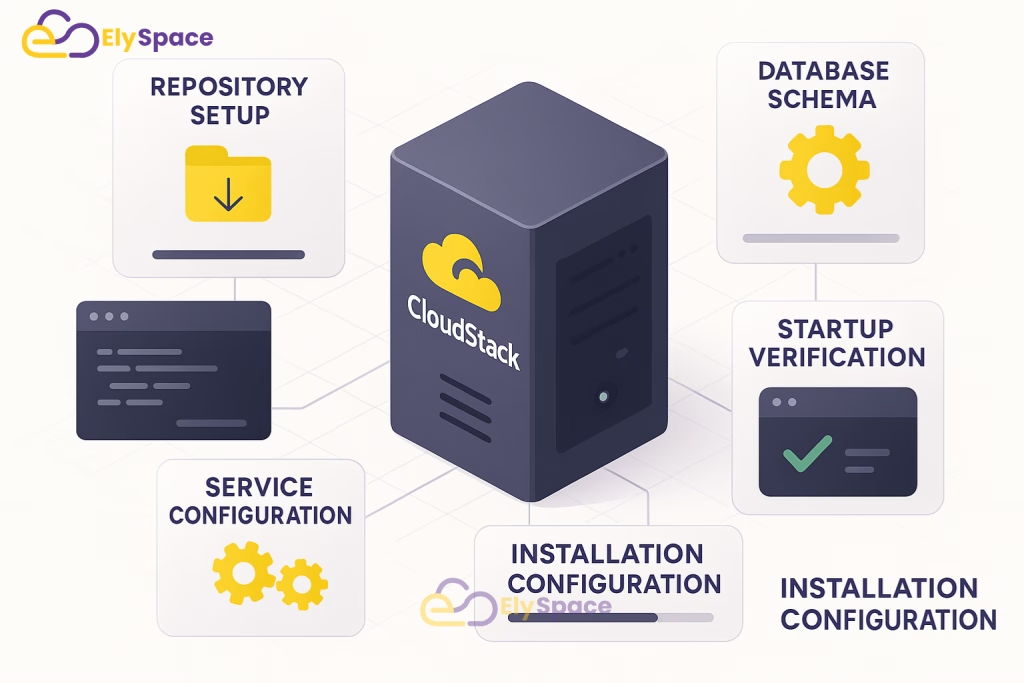
CloudStack Management Server Installation
The CloudStack Management Server is the central control component of your cloud infrastructure. It provides the web interface, API endpoints, and orchestration logic that manages all cloud resources. This section will guide you through installing and configuring the management server step by step.
Understanding the Management Server Role
The CloudStack Management Server acts as the brain of your cloud infrastructure. It’s responsible for:
- User Interface: Providing the web-based dashboard for administrators and users
- API Services: Offering RESTful APIs for programmatic cloud management
- Resource Orchestration: Coordinating virtual machine lifecycle operations
- Network Management: Managing virtual networks, VLANs, and IP allocations
- Storage Coordination: Handling storage pool management and volume operations
- Hypervisor Communication: Interfacing with KVM, VMware, or XenServer hosts
- Billing and Metering: Tracking resource usage and generating billing data
- Security Management: Handling authentication, authorization, and access control
The management server is stateless, meaning all persistent data is stored in the database. This design allows for high availability setups where multiple management servers can run simultaneously.
Step 1: Adding the CloudStack Repository
Before installing CloudStack, we need to add the official Apache CloudStack repository to our system. This ensures we get the latest stable version with proper dependency management.
rpm -Uvh https://downloads.apache.org/cloudstack/cloudstack-release-4.18.1.0.el7.noarch.rpmWhat this command does:
This command downloads and installs the CloudStack repository configuration package. The package contains the repository definition that tells the YUM package manager where to find CloudStack packages and their dependencies.
Why we use the official repository:
- Security: Packages are digitally signed by the Apache CloudStack team
- Compatibility: Packages are tested together and guaranteed to work
- Updates: Easy access to security updates and bug fixes
- Dependencies: Automatic resolution of required supporting packages
Version considerations:
The URL in this example points to CloudStack version 4.18.1.0. You should check the Apache CloudStack website for the latest stable version and update the URL accordingly. Using the latest stable version ensures you have the most recent features and security fixes.
What happens after installation:
The repository package creates configuration files in /etc/yum.repos.d/ that define where YUM should look for CloudStack packages. You can verify the repository was added correctly by running:
yum repolist | grep cloudstackStep 2: Installing the Management Server Package
Now we can install the CloudStack management server and all its dependencies:
yum install -y cloudstack-managementWhat this command installs:
This command installs the main CloudStack management server package along with numerous dependencies including:
- Java Runtime Environment: CloudStack is written in Java and requires a JRE
- Tomcat Application Server: Hosts the CloudStack web application
- CloudStack Core Libraries: The main application code and business logic
- Database Connectors: Libraries for connecting to MySQL/MariaDB
- Utility Scripts: Helper scripts for configuration and maintenance
Installation process details:
The installation process typically takes 5-15 minutes depending on your internet connection speed. During installation, the package manager will:
- Download all required packages (approximately 200-300 MB)
- Install Java and Tomcat if not already present
- Create the CloudStack system user and group
- Set up directory structures for logs and configuration
- Install CloudStack application files
- Configure basic system integration
Post-installation file locations:
After installation, CloudStack files are organized as follows:
- Application files:
/usr/share/cloudstack-management/ - Configuration files:
/etc/cloudstack/management/ - Log files:
/var/log/cloudstack/management/ - Database scripts:
/usr/share/cloudstack-common/scripts/
Step 3: Setting Up the CloudStack Database Schema
CloudStack requires a properly initialized database with its schema and initial data. The cloudstack-setup-databases script automates this process:
cloudstack-setup-databases cloud:your_database_password@localhost --deploy-as=root:your_root_passwordImportant: Replace your_database_password with the password you set for the ‘cloud’ database user, and your_root_password with your MySQL root password.
What this script does:
The setup script performs several critical database operations:
- Schema Creation: Creates all necessary tables, indexes, and constraints
- Initial Data: Populates tables with default configuration data
- User Verification: Confirms the database user has proper permissions
- Connection Testing: Verifies the management server can connect to the database
Database schema overview:
CloudStack’s database schema includes over 200 tables organized into several categories:
- User Management: Tables for accounts, users, and permissions
- Infrastructure: Tables for zones, pods, clusters, and hosts
- Virtual Machines: Tables for VM instances, templates, and ISOs
- Networking: Tables for networks, VLANs, and IP addresses
- Storage: Tables for storage pools, volumes, and snapshots
- Events and Logs: Tables for audit trails and system events
Script execution details:
The script execution typically takes 2-5 minutes and produces output showing:
- Database connection status
- Schema creation progress
- Initial data insertion results
- Final verification checks
Common issues during database setup:
- Connection failures: Usually caused by incorrect passwords or database not running
- Permission errors: The database user lacks necessary privileges
- Schema conflicts: Previous CloudStack installation remnants in the database
- Disk space: Insufficient space for database files
Verification steps:
After the script completes successfully, you can verify the database setup:
mysql -u cloud -p -e "USE cloud; SHOW TABLES;" | wc -lThis command should return a number greater than 200, indicating all tables were created successfully.
Step 4: Configuring the Management Server
The next step is to configure the management server itself using the setup script:
cloudstack-setup-managementWhat this script configures:
The management setup script performs several important configuration tasks:
- Database Connection: Configures the management server to connect to your database
- Encryption Keys: Generates encryption keys for secure communication
- System Properties: Sets up default system configuration parameters
- Log Configuration: Configures logging levels and file rotation
- Service Integration: Prepares the service for systemd management
Configuration file locations:
The script creates and modifies several configuration files:
- Main config:
/etc/cloudstack/management/db.properties - Log config:
/etc/cloudstack/management/log4j-cloud.xml - System properties:
/etc/cloudstack/management/environment.properties
Security considerations:
During configuration, the script generates several security-related items:
- Database encryption key: Used to encrypt sensitive data in the database
- API signing keys: Used for secure API communication
- Session encryption: Keys for securing user sessions
What happens during execution:
The configuration process typically takes 1-2 minutes and includes:
- Reading database connection parameters
- Testing database connectivity
- Generating security keys and certificates
- Writing configuration files
- Setting appropriate file permissions
Step 5: Starting the Management Server Service
Now we can start the CloudStack management server service:
systemctl start cloudstack-management
systemctl enable cloudstack-management
What these commands do:
The first command immediately starts the CloudStack management service. The second command configures the service to start automatically when the system boots.
Service startup process:
When the management server starts, it goes through several initialization phases:
- JVM Initialization: Starts the Java Virtual Machine with appropriate memory settings
- Database Connection: Establishes connection pool to the database
- Component Loading: Loads all CloudStack modules and plugins
- Service Registration: Registers internal services and APIs
- Web Interface: Starts the Tomcat web server for the user interface
- API Endpoints: Activates REST API endpoints for programmatic access
Startup time expectations:
The initial startup typically takes 3-8 minutes, depending on your system’s performance. Subsequent startups are usually faster (1-3 minutes) as the JVM optimizes the code.
Monitoring startup progress:
You can monitor the startup process by watching the log files:
tail -f /var/log/cloudstack/management/management-server.logLook for messages indicating successful component initialization and the final “Management server is ready” message.
Service status verification:
Check that the service is running correctly:
systemctl status cloudstack-managementThe output should show “active (running)” status. If the service fails to start, check the log files for error messages.
Port verification:
Verify that the management server is listening on the correct ports:
netstat -tlnp | grep javaYou should see the Java process listening on port 8080 (web interface) and port 8250 (API).
Step 6: Initial Service Verification
Before proceeding to the next steps, it’s important to verify that the management server is functioning correctly:
Log file verification:
Check the management server logs for any error messages:
tail -50 /var/log/cloudstack/management/management-server.logLook for any ERROR or WARN messages that might indicate configuration problems.
Database connectivity test:
Verify that the management server can communicate with the database:
mysql -u cloud -p -e "SELECT COUNT(*) FROM cloud.configuration;"This should return a number greater than zero, indicating the management server has populated the configuration table.
Web interface accessibility:
Test that the web interface is accessible (we’ll cover this in detail in the next section):
curl -I http://localhost:8080/clientThis should return HTTP 200 status, indicating the web server is responding.
Memory usage check:
Monitor the Java process memory usage to ensure it’s within expected ranges:
ps aux | grep java | grep cloudstackThe management server typically uses 1-4 GB of RAM depending on your configuration and load.
For offical Documention of Cloudstack https://docs.cloudstack.apache.org/en/4.21.0.0/
Conclusion
Installing Apache CloudStack is a sequential process that is very easy, provided we follow the correct way. This guide covered some basics from preparing your server to completing its installation. But once it is up and running, CloudStack provides you with a dynamic tool for controlling your cloud infrastructure.
Need Expert Help?
If you don’t want to spend time on technical details or face any issues, you can get professional help.
👉 Hire a CloudStack Expert on Fiverr